 ultimate-guide
Best Citrus Tree Care for Desert Soil: 2026 Guide
Table of Contents
- Why Desert Soil Challenges Citrus Trees
- Citrus Tree Watering Schedule Desert: Deep Irrigation That Works
- Best Fertilizer for Citrus Trees in Arizona
- When to Prune Stressed Citrus Trees
- DIY Soil Amendment Recipes for Desert Citrus
- Micro-Climate Mapping: Finding the Best Spot for Your Citrus
- Long-Term Soil Health Maintenance
- Frequently Asked Questions
Last Updated: September 13, 2026
Why Desert Soil Challenges Citrus Trees
Desert soil is a high-pH, calcium-rich medium that locks up the micronutrients citrus needs most, so the best citrus tree care desert soil strategy starts with chemistry, not water. At Local Choice Pest &Landscape Nutrition, we see the same pattern across Cave Creek and North Scottsdale: healthy-looking trees that yellow, stall, and drop fruit for reasons owners can't see underground.
High pH and Nutrient Lockout
Most desert soils sit between pH 7.5 and 8.5; citrus wants 6.0 to 6.5 (Citrus). In that gap, iron, zinc, and manganese become chemically unavailable even when present, the tree isn't starving because the soil is empty, but because nutrients are locked in forms roots can't absorb.
The visible result is iron chlorosis: yellow leaves with green veins, starting on new growth. Left alone, it progresses to twig dieback and poor fruit set. The University of Arizona Cooperative Extension guide to soil pH and plant nutrition explains how alkaline conditions drive this lockout.
Caliche and Poor Drainage
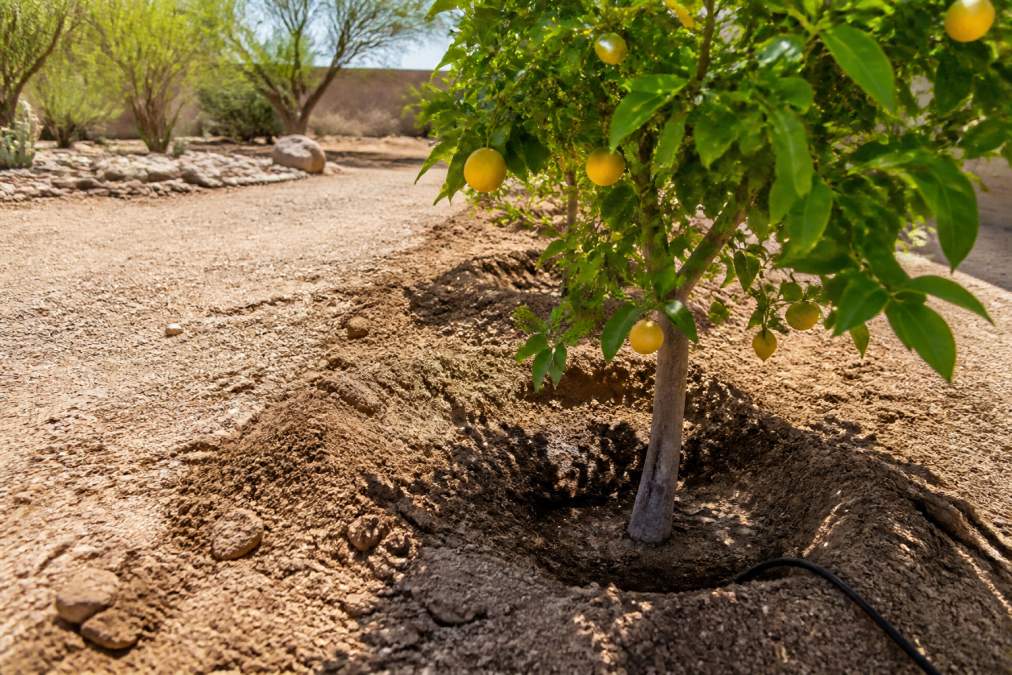
Caliche is a cemented calcium carbonate layer in desert subsoil and the single most common reason citrus fails here. Water hits the layer, stops, and sits; roots drown, and root rot follows, often within one monsoon season.
Test it with a shovel and hose: dig a 30-centimeter hole, fill it with water, and watch. If water still stands after several hours, you have a drainage problem, and possibly caliche.
Citrus Tree Watering Schedule Desert: Deep Irrigation That Works
A citrus tree watering schedule desert gardeners can rely on means watering deeply and infrequently, not lightly and often. Shallow daily watering keeps moisture in the top few centimeters, where it evaporates; deep watering pushes roots downward, where soil stays cool and moist longer.
For established trees, soak the root zone slowly every 7 to 14 days in summer, stretching to every 3 to 4 weeks in winter (extension.arizona.edu). Newly planted trees need more frequent, smaller applications until roots establish. The goal is to wet the soil 60 to 90 centimeters deep, then let the top layer dry before watering again.
How to Check Soil Moisture
Stick a long screwdriver or soil probe into the ground about 15 centimeters from the trunk, under the canopy edge. If it slides easily, the soil is still moist; if it resists, it's time to water. A moisture meter gives you a number rather than a feel. Either method beats guessing, the surface can look bone-dry while the root zone is still saturated, especially with caliche underneath.
Three things that make deep watering work:
- Drip systems running 2 to 4 hours per cycle, rather than short daily bursts
- Basins or berms around the trunk to hold water in place until it soaks in
- Mulch 5 to 10 centimeters deep, kept a hand's width away from the trunk
Mulch slows evaporation and moderates soil temperature, which matters when summer air temperatures push past 43°C and transpiration outpaces what roots can replace. That's when heat stress shows up as leaf curl and fruit drop.
Best Fertilizer for Citrus Trees in Arizona
The best fertilizer for citrus trees in Arizona is a citrus-specific blend with chelated iron, zinc, and manganese, applied on a schedule that matches the tree's growth cycle rather than the calendar alone. Standard balanced fertilizers underperform here because they don't address alkaline-soil deficiencies.
| Timing | Application | Purpose |
|---|---|---|
| Late winter (Feb-Mar) | First feeding of the year | Supports spring flush |
| Late spring (May) | Second feeding | Fuels fruit development |
| Early fall (Sep) | Final feeding | Builds reserves before dormancy |
| Avoid | Feeding after October | Encourages tender growth before frost |
Timing and Application Rates
Spread granular fertilizer evenly under the canopy to the drip line, then water it in thoroughly. Never pile it against the trunk; it burns bark and invites pests.
Micronutrients deserve separate attention. A chelated iron soil drench or foliar spray corrects chlorosis faster than granular nitrogen alone. Nitrogen drives leaf and shoot growth, but pushing it without fixing iron and zinc just produces more yellow leaves.
When to Prune Stressed Citrus Trees
When to prune stressed citrus trees is a timing question with a clear answer: wait. A stressed tree is already spending energy on survival, and every cut is a wound it must seal. Prune only dead, diseased, or crossing wood, in late winter or early spring before the first flush. Heavy structural pruning should wait until the tree has recovered, usually a full growing season of steady growth and normal leaf color. Homeowners who prune aggressively to "fix" a yellowing tree make the decline worse.
Why Timing Differs in Desert Heat
In cooler citrus regions, growers can prune almost any time the tree is not actively flushing. Desert conditions remove that flexibility, for two reasons:
- Sunburn on exposed bark. Citrus bark shaded by canopy for years has no acclimation to direct sun. Remove that canopy in June and the trunk and scaffold branches can scorch within days, cracking and inviting borers, the single most common pruning injury we see on desert properties.
- Heat-driven water loss. A freshly pruned tree has fewer leaves to shade its own root zone and trunk, so soil temperatures climb and moisture evaporates faster. Pruning in the cool season gives the tree weeks to harden off before summer.
The practical window is late February through early April, after the last frost risk but before the spring flush pushes hard. A light cleanup prune in late September is fine if the tree is healthy; skip it if the tree shows chlorosis, dieback, or fruit drop.
Schedule a Free In-Home Estimate →
What to Cut and What to Leave
- Remove suckers below the graft union any time; they steal energy from the canopy and, on many rootstocks, grow aggressively in desert heat
- Take out dead, diseased, and crossing wood first; that is the only pruning a stressed tree should receive
- Sterilize pruners between trees with isopropyl alcohol to avoid spreading disease
- Never remove more than about a quarter of the canopy in one season
- Skip pruning entirely during extreme heat, and never prune within two weeks of a forecast above 38°C
- Leave low-hanging interior branches that shade the trunk; they are doing structural work even if they look untidy
Pruning to Reduce Heat Stress, Not Just Shape
Most guides treat pruning as shaping. In desert yards, the goal is a canopy that shades its own trunk and root zone while letting morning light reach the interior: favor a slightly denser canopy on the south and west sides and keep the east side more open. A tree trained this way runs several degrees cooler at the bark than one pruned for symmetry alone.
If a tree has already lost canopy to sunburn or dieback, don't try to balance it in one season. Remove the dead wood, whitewash newly exposed trunk and scaffold branches with diluted latex paint to reflect heat, and let the tree rebuild over two or three growing seasons.
Aftercare for a Pruned Tree
A pruned tree needs water and micronutrients more than fertilizer. Irrigate deeply within 24 hours to reduce shock, and hold off on nitrogen for four to six weeks, it pushes tender growth with no canopy to protect it. A chelated iron and zinc foliar spray two to three weeks after pruning greens the tree without forcing a flush.
DIY Soil Amendment Recipes for Desert Citrus
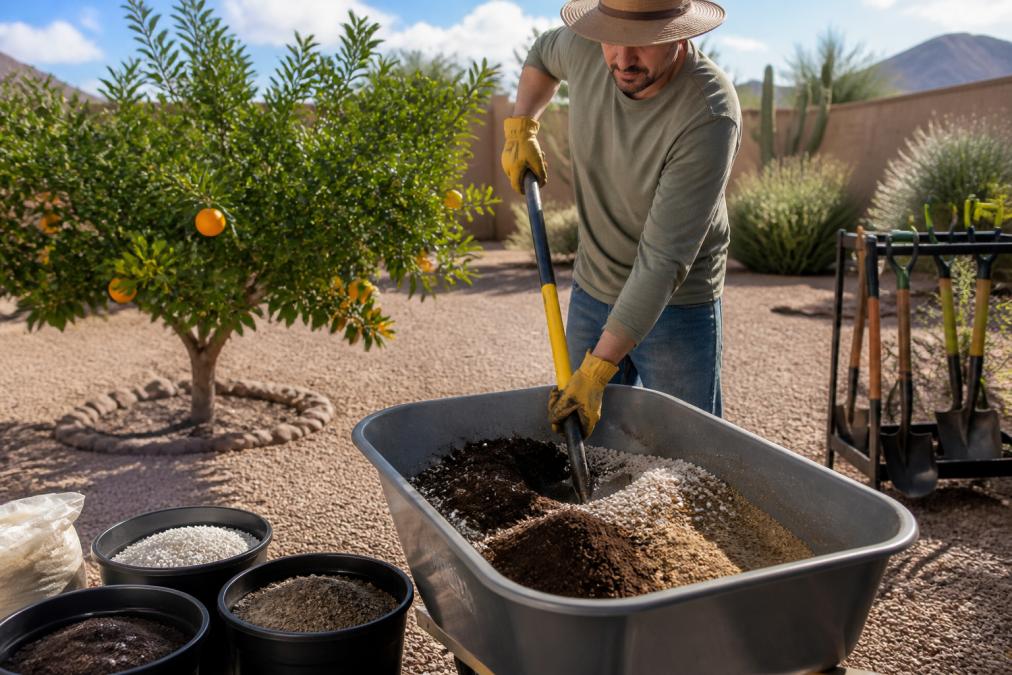
A workable amendment mix for desert citrus combines roughly 40 percent native soil, 30 percent organic matter such as compost, and 30 percent coarse perlite or pumice for drainage, balancing moisture retention against the drainage citrus roots demand. But the ratio is only the starting point; what separates a mix that works from one that fails is what goes into each component and how the planting hole is built.
The Base Recipe, by Volume
For a single in-ground planting hole sized roughly 60 centimeters wide and 60 centimeters deep:
- 4 parts native soil, sifted to remove rocks and caliche chunks
- 3 parts finished compost, steer manure blends, mushroom compost, or a local green-waste compost all work; avoid uncomposted manure, which burns roots
- 2 parts coarse perlite or pumice, perlite is lighter and cheaper, pumice holds up longer in alkaline soil and does not float to the surface
- 1 part coarse sand, only if your native soil is heavy clay; skip it in sandy yards
- 1 cup gypsum per planting hole, mixed throughout, to help displace sodium in sodic soils without shifting pH
- 1 cup elemental sulfur per planting hole, mixed into the top 15 centimeters only, to begin a slow pH reduction
Mix everything on a tarp or in a wheelbarrow until the texture is uniform. The finished mix should clump when squeezed and crumble when poked, that is the drainage signature you want.
Why Each Component Earns Its Place
Compost does three jobs at once: it feeds soil microbes, improves structure so water and air both move, and slowly buffers pH downward as it breaks down. It is the only component that addresses all three desert soil problems, alkalinity, low organic matter, and poor microbial activity, simultaneously.
Perlite or pumice creates pore space. In a desert yard, the failure mode is rarely drought; it's a monsoon week that saturates heavy soil and drowns roots. Coarse aggregate keeps oxygen in the root zone even after heavy rain.
Gypsum supplies calcium without raising pH, and its calcium displaces sodium on soil particles so the sodium can leach away, important in yards irrigated for years with high-salt municipal or well water.
Elemental sulfur is the slow lever on pH: soil bacteria convert it to sulfuric acid over weeks to months, gradually pulling pH down. It is not a quick fix, and too much at once can shock roots. One cup per hole is a conservative starting dose; adjust based on an annual soil test.
Building the Hole So the Tree Does Not Hit a Wall
Amend the entire planting hole, not just the backfill, and rough up the sides and bottom with a shovel or auger. A smooth-walled hole in clay or caliche becomes a bathtub: water enters the amended soil, hits the slick native wall, and cannot drain sideways. Roughening the walls gives roots and water a path out.
If you hit solid caliche within the top 60 centimeters, don't try to punch through it with a pickaxe. Plant on a raised mound 30 to 45 centimeters tall, or choose a different spot, a tree planted on top of caliche survives one or two seasons on nursery vigor, then declines.
For containers, use a commercial potting mix blended for citrus rather than garden soil. Products like Gardenera Premium Lemon Tree Soil Mix combine peat moss, perlite, and worm castings for drainage and aeration, though they cost more than bulk soil. Terra cotta pots also help, since the porous clay wicks excess moisture from roots, though they dry out fast in summer heat.
Long-Term Soil Biology: The Part Most Guides Skip
Amending at planting is a one-time event. What determines whether a citrus tree thrives in year five is the soil biology after planting, where nearly every desert citrus guide goes quiet.
Three habits keep soil biology working in alkaline, low-organic-matter conditions:
- Top-dress with compost every spring. Two to five centimeters under the canopy, kept a hand's width off the trunk, feeds worms and microbes that cycle nutrients. Don't dig it in; citrus roots are shallow and resent disturbance.
- Maintain a living mulch or cover crop in the surrounding bed. A low-growing legume like clover or a native desert groundcover shades the soil, fixes nitrogen, and supports fungal networks that extend the root zone. Keep it at least 30 centimeters from the trunk so it doesn't compete for water under the canopy.
- Inoculate with mycorrhizal fungi at planting. These fungi form a symbiotic relationship with citrus roots and dramatically extend the root surface area for nutrient and water uptake. In alkaline soils where iron and zinc are locked, the fungal network is one of the few mechanisms that can still deliver those micronutrients. Mix the inoculant into the backfill at planting; it's difficult to establish later.
A yearly routine that compounds:
- Spring: top-dress compost, refresh mulch
- Summer: leach the root zone once to push accumulated salts below the roots
- Fall: soil test for pH, salinity, and organic matter; adjust sulfur dose based on results
- Winter: leave fallen leaves in place under the canopy as free mulch and fungal food
None of these steps is expensive; they require consistency. A desert citrus tree planted in a well-built hole and then ignored will outperform one planted in mediocre soil and pampered for a season, but the tree that gets both will outproduce either by a wide margin.
Schedule a Free In-Home Estimate →
Micro-Climate Mapping: Finding the Best Spot for Your Citrus
Micro-climate mapping means walking your property at different times of day, recording where heat, wind, and reflected light concentrate, then planting accordingly. Two spots 10 meters apart can differ by several degrees.
Here's how to map yours:
- Walk the yard at mid-morning, mid-afternoon, and dusk on a hot day
- Note where walls, fences, or pavement radiate heat back onto plants
- Check which areas hold cold air in winter; low spots collect frost
- Watch wind patterns; exposed corners shred leaves and dry soil faster
- Mark the spot with the most morning sun and afternoon shade
Citrus wants full sun, but in desert heat, afternoon shade from a west-facing wall or a mesquite canopy reduces heat stress substantially. South and east exposures generally beat west-facing spots that bake all afternoon.
Long-Term Soil Health Maintenance
Long-term soil health in desert citrus comes down to three habits repeated yearly: add organic matter, monitor pH, and flush salts from the root zone. Skip one and the other two lose ground.
Salinity builds up because irrigation water carries dissolved salts and evaporation leaves them behind; over time, that accumulation damages roots and blocks nutrient uptake. The fix is leaching: water deeply and long enough to push salts below the root zone, one more reason deep watering beats frequent shallow cycles.
Acidifier products, typically sulfur-based, gradually lower pH when applied consistently. They work slowly, so test your soil annually rather than guessing; a lab soil test gives actual numbers for pH, salinity, and available nutrients.
Cation exchange capacity tells you how well your soil holds nutrients. Sandy loam holds them poorly; heavy clay holds them well but drains badly. Knowing which you have shapes everything else.
A yearly routine that works:
- Top-dress with compost in early spring
- Test soil pH and salinity each fall
- Apply elemental sulfur if pH climbs above 7.0
- Refresh mulch twice a year
- Leach the root zone once in summer and once in late winter
For homeowners who'd rather not manage the chemistry themselves, a professional landscape nutrition program handles testing, amendment selection, and application timing. Local Choice Pest &Landscape Nutrition builds these programs around each property's specific soil conditions, and because the same team handles pest and rodent pressure, you're not coordinating two contractors who never talk.
Desert soil doesn't have to be a losing battle for citrus. Fix the pH and drainage first, water deeply and infrequently, feed with chelated micronutrients on a schedule, and let soil health build year over year. Local Choice Pest &Landscape Nutrition handles the soil testing, custom amendment planning, and seasonal fertilizer applications for Arizona properties, with products chosen for alkaline conditions and safe around kids, pets, and desert wildlife. Get started with Local Choice Pest &Landscape Nutrition and schedule a free in-home estimate for your citrus and landscape nutrition plan.
Frequently Asked Questions
What is the best type of soil for citrus trees in the desert?
The ideal soil for desert citrus is a sandy loam that drains quickly but holds some moisture. Native desert soil often contains caliche, a cemented layer that blocks roots and water. Amend with organic matter like compost and perlite to improve structure. Aim for a soil pH between 6.0 and 7.0. If your soil is highly alkaline, add elemental sulfur or use acidifying fertilizers. Container growing with a specialized potting mix is a good alternative for challenging sites.
How do I care for a citrus tree in desert climates?
Focus on deep watering, proper fertilization, and heat protection. Water slowly and deeply two to three times per week in summer, less in winter. Use a citrus-specific fertilizer with micronutrients like iron and zinc. Mulch around the base to retain moisture and keep roots cool. Provide afternoon shade for young trees. Monitor for pests like aphids and mites. Prune only to remove dead or damaged wood; avoid heavy pruning during extreme heat.
Do citrus trees grow well in native desert soil?
They can, but native desert soil presents challenges: high pH, low organic matter, and caliche layers. Citrus prefers slightly acidic, well-draining soil. Without amendments, trees may suffer from nutrient deficiencies, especially iron chlorosis. Test your soil pH and drainage. If caliche is present, consider raised beds or containers. Incorporate compost and gypsum to improve soil structure. Regular applications of chelated iron and zinc can help correct deficiencies.
How often should I fertilize citrus trees in alkaline soil?
Fertilize three to four times per year: late winter, late spring, and early fall. Use a fertilizer formulated for citrus, with nitrogen, phosphorus, potassium, and micronutrients. In alkaline soil, micronutrients like iron, zinc, and manganese become less available, so choose a product that includes them. Apply according to label rates based on tree age and size. Water thoroughly after application. Avoid fertilizing in late fall to prevent tender growth before frost.
What are the signs of nutrient deficiency in desert citrus trees?
Common signs include yellowing leaves with green veins (iron chlorosis), small leaves and poor fruit set (zinc deficiency), and mottled or distorted new growth (manganese deficiency). Nitrogen deficiency causes overall pale green leaves and stunted growth. Magnesium deficiency shows as yellowing between veins on older leaves. If you see these symptoms, test your soil and apply chelated micronutrients or a balanced citrus fertilizer. Adjust watering practices to ensure nutrients are available.
Can I use cactus potting mix for citrus?
Cactus potting mix is too fast-draining for citrus. While citrus needs good drainage, it also requires consistent moisture. Cactus mix dries out too quickly, leading to drought stress. Instead, use a citrus-specific potting mix or make your own with peat moss, perlite, and compost. This blend holds moisture while allowing excess water to drain. If you must use cactus mix, amend it with compost to increase water retention.